| |
| |
Usage guide:
|
| |
This is your four steps to a successful Cornellbox scene using the Cornellbox generator guide. |
| |
| |
Step 1: Installing the plug-in |
| |
Unzip the file in the archive either directly to your 3D Studio Max plug-in directory which is probably
something like c:\Program Files\Autodesk\3dsMax8\plugins or unzip it in your desired arbitrary directory. If
you decide to go for the later option don't forget to add this plug-in directory into your user paths. You can find
this under Customize->Configure User Paths...->3rd Party Plug-Ins |
| |
Step 2: Starting up the plug-in |
| |
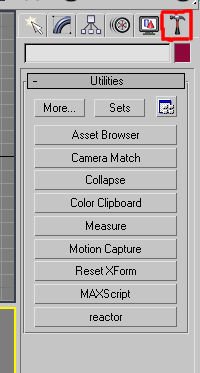 |
Select the hammer symbol on the right side of your screen as illustrated in the image on the left.
That will switch to the utilities tab of 3D Studio Max. As the Cornellbox Generator is a utility plug-in you will find it there. |
| |
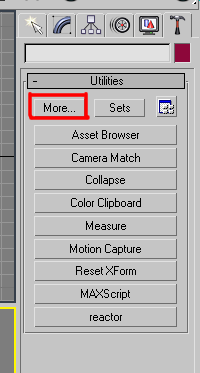 |
Since the Cornellbox generator will not automatically appear in the short list of utilities you have to
click on the more button as marked in the image on the left, to bring up the complete list of installed utility plug-ins
in your 3D Studio Max installation. |
| |
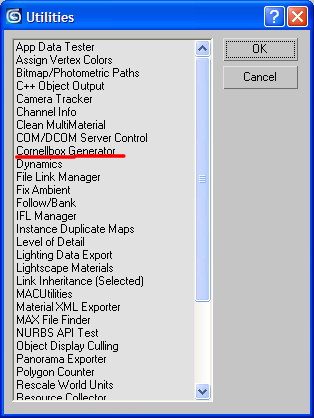 |
Now a window with the title Utilities should popup. It should look similar to the image illustrated
on the left. Search for the entry marked in the image on the left it should be quite on the top since this list is alphabetically
ordered. If you can not find it in the list Step 1 must have gone wrong so please go back to Step 1! After you have
selected it click okay! You are now ready for Step 3! |
| |
Step 3: Configure your Cornellbox scene |
| |
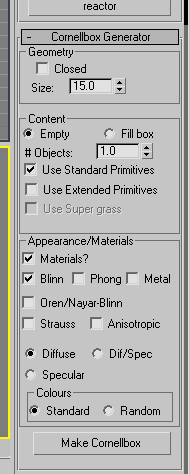 |
The Cornellbox Generator gives you several options how your Cornellbox scene can look like. The first option
you can choose from is if you want your box completely closed or not. The standard Cornell box only has five sides the front
side is removed to let space for your camera. Of course you can always place your camera inside of the box so you are not
limited to a open box. The next option tells the generator if you want to have an empty box or filled up with other
arbitrary objects. You can choose the number of objects and what group they should be coming from. In the next group of
options you can change the appearance of the box and its interior objects. You can either say materials should be assigned
or not by ticking the Materials? checkbox. If you choose no materials they will just receive the random colour
Max chooses similar to when you create a new object. If you choose to go for materials the Cornellbox generator will
assign randomly materials to the objects from the group you choose further down. The exception here is that all the sides
of the box will have the same material (Blinn for example) but with different material parameter settings. You can also
choose if the materials should only have a diffuse, a specular part or both. Last but not least you can choose the
colour parameters. If you go for standard, the sides of the box will have the classic colours assigned to them as
described on the Cornell University site. Interior objects get
assigned random colours. In the case of random colours also for the sides of the Cornellbox random colours will be chosen.
If you are satisfied with the settings you are ready for Step 4!
|
| |
Step 4: Creating the Cornellbox scene |
| |
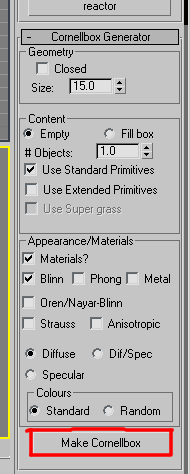 |
Just click on the big Make Cornellbox button as indicated in the picture on the left! And voila your
Cornellbox scene will be generated for you. Now you just have to add a camera and some lights and you are ready to render it!
|